Completing a Reservoir Sample
- Sam Goddard
From the Remote Sampler home screen, tap on the Samples button.

The first screen shown is the Select Collection Run screen. This screen shows a list of all the different worksheets that have been sent to the device. Each worksheet appears as a single row in the list and they can be completed in any order.
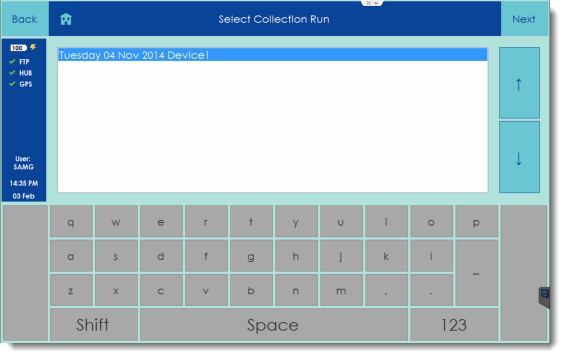
To open a worksheet, tap on the row - in the image above, there is only row since we only have one worksheet on the device - and tap the Next button.
The next screen shown gives an overview of the work contained within the worksheet. It shows a list of the bottles needed for collection, as well as a list of the places that will be visited in order to collect samples. It is possible to switch between these lists using the two blue buttons on the left of the grid.

Tap Next to move on to the next step in the work-flow.
The following screen shows a breakdown of the sampling sites for which there is still uncompleted work.
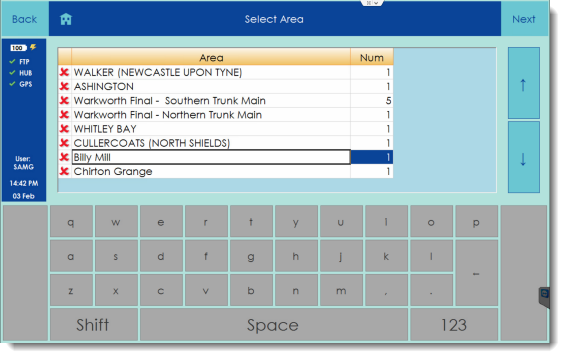
Each of the incomplete site has a red cross next to it. The column on the right-hand side of the grid indicates how many sample points there are at that particular site. The list contains all types of scheduled samples. Tap on a row to select the corresponding site and then tap Next. A list of the sample points within the area selected area will be shown.
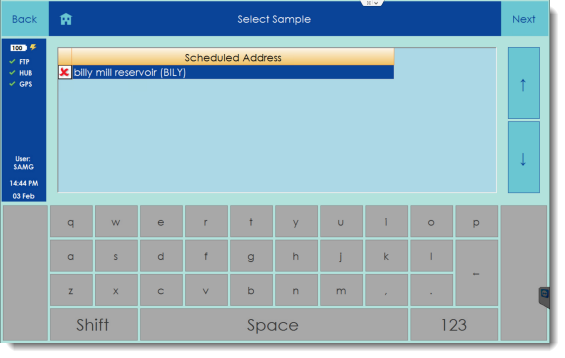
In the case of Billy Mill above, there is only a single sample point and so there is only one row in the list. Tap the row to select it and then tap Next.
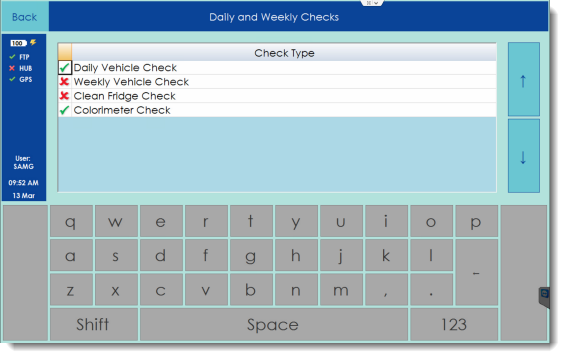
Remote Sampler also checks at the start of each sample to make sure that all daily and weekly checks that are required have actually been completed. In this case, a daily vehicle check and the first part of a colorimeter check was completed but there are still outstanding checks that need to be finished before sampling can commence. The message below will be shown.
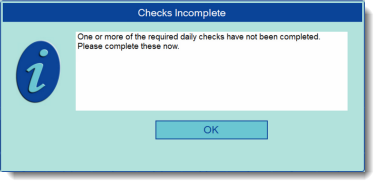
Tap OK and then the Daily and Weekly Checks screen will show. Complete the remaining checks that have crosses next to them in exactly the same way as the earlier exercises.
Once all the required checks have been completed, they will appear with green ticks along side.
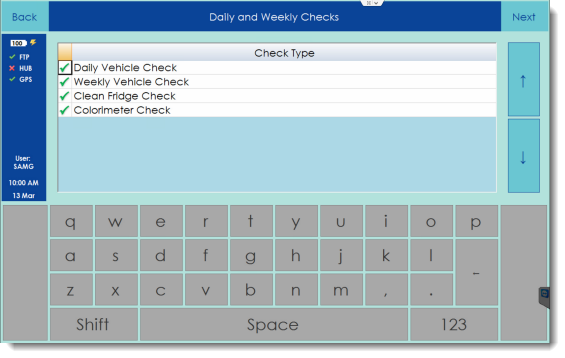
Tap Next to return to the sampling workflow.
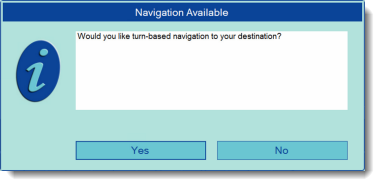
If Remote Sampler knows the address or co-ordinates for the selected sample point, the option of turn-based GPS route-navigation will be provided.
The next screen displays information about which bottles and equipment will be needed at the sample point itself. In this case, there is a single bottle to fill.
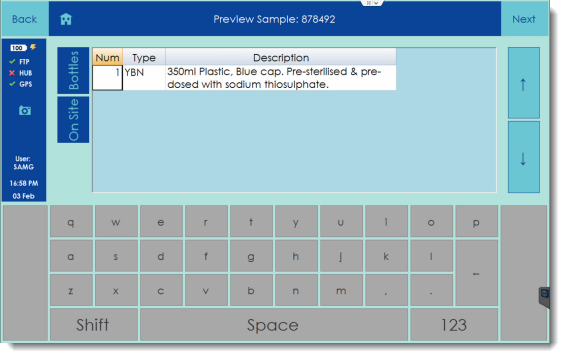
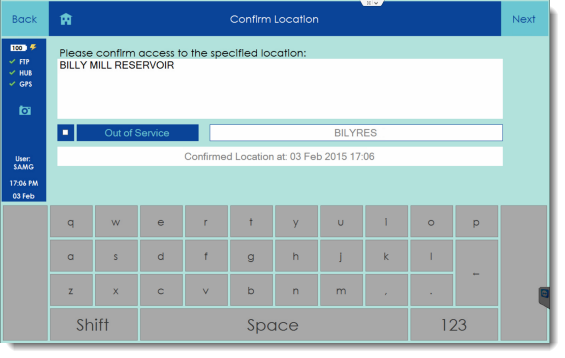
Tapping the Onsite button on the left will show a list of the on-site tests that will be required at the sample point. This provides an indication of what sampling instrumentation may be needed e.g. a colorimeter to record chlorine values etc. Tap Next to continue to the Confirm Location screen. At this stage in the sampling work-flow, Remote Sampler requires confirmation on whether it is possible to access the sample point or whether there is a problem.

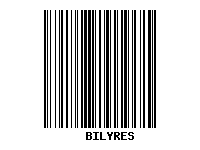
To confirm arrival at a reservoir or other water company asset, scan the associated barcode for the sample point using the barcode scanner on the device(for the Panasonic FZ-G1, press the A2 button).
Warning
Scanning the site barcode will confirm arrival at the location. Tap Next to progress.
Following arrival at the sample point, the next step is to enter all of the on-site data that is required for this sample. Tap on each row in the grid in turn and enter the values as shown in the image below.
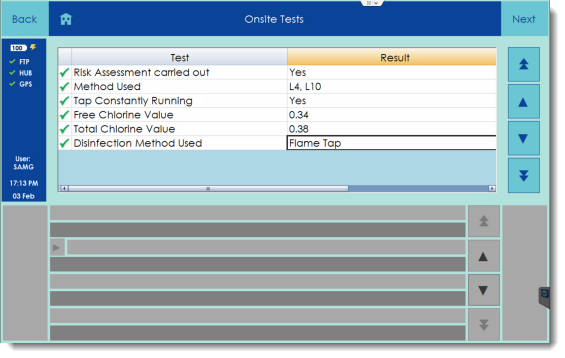
When all values have been entered, tap the Next button to progress. The following screen in the work-flow provides an opportunity to scan the LIMS barcode that is present on the sample bottle for this sample.
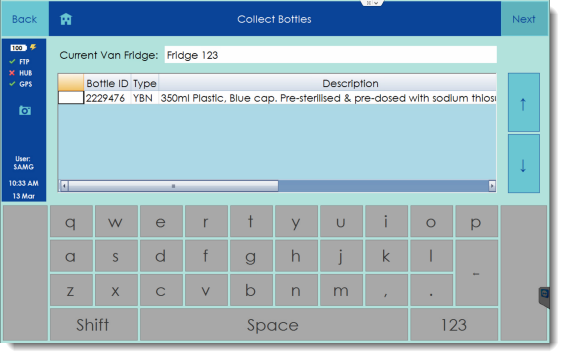
To do this, simply scan the barcode in exactly the same way as for the sample point barcode.
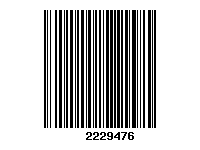
If the correct barcode is scanned, a tick will appear in the left-hand column indicating that the sample has been collected. If the tick is red, this indicates that the device did not have a valid GPS position at the time it was scanned. However, this is still perfectly acceptable.

If an incorrect barcode is scanned, the message below will be shown.
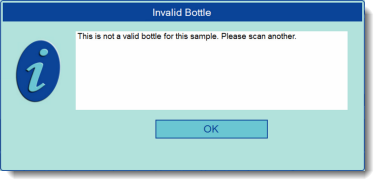
Simply tap the OK button and try again.
If for some reason the barcode scanner on the device does not work, it is also possible to register the collection of the bottle by tapping the required row on the screen with a finger. When the bottle has been successfully scanned, tap the Next button to move to the following screen.
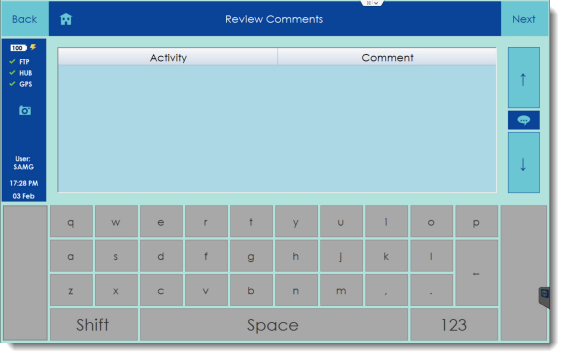
This screen shows a list of all the comments that have been entered during the collection of this sample, in the case of this example, there are none.
Additional comments can be added if needed by using the  button. Tap Next to move onto the following step which is simply a review screen for all the data that has been entered so far on the sample.
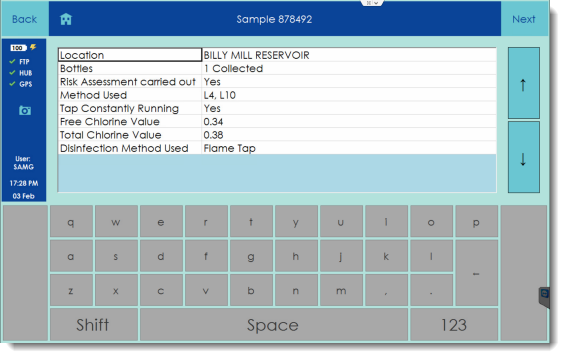
Tap Next to continue.
The last screen for this sample has only a single button on it. Press this button to confirm the completion of the sample and send it back to LIMS.
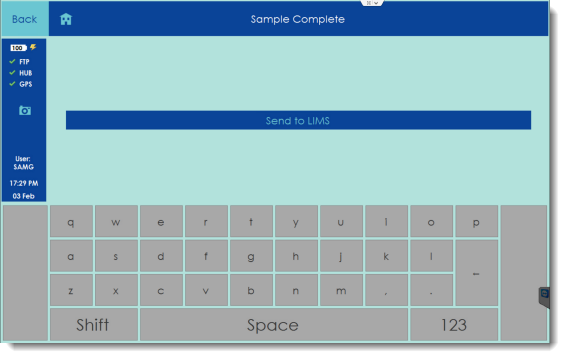
Remote Sampler will then ask whether this is the final sample of the day. It does this so that it knows when the correct time is to ask for any remaining data from the daily or weekly check worksheets that are still on the device.
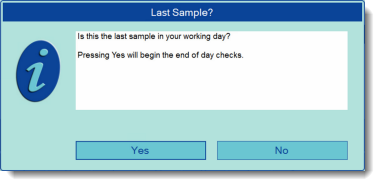
If you plan on performing more samples today, so push the No button. A confirmation message will then be displayed.
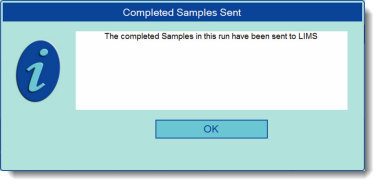
Pressing OK completes the final step in sending the sample back to the hub.
Tip