Creating an Ad Hoc Sample
In this example we will work create a new ad hoc sample to handle some reactive work that has come in.
From the Remote Sampler home screen, tap on the Ad Hoc button.

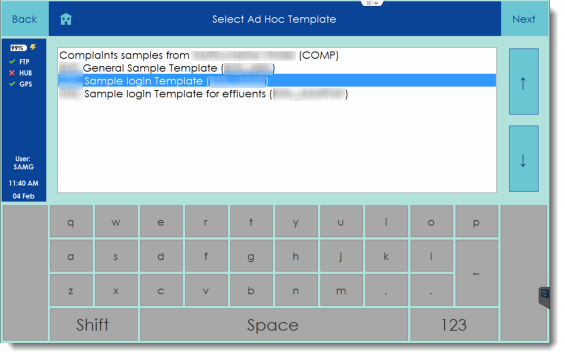
Ad hoc samples are different from scheduled samples in that they have not been created by LIMS. This means that before we can perform an ad hoc sample, we need to first create one. The first step in this process is to select a template to use to create the sample. In your live system, these templates will match the existing LIMS process.
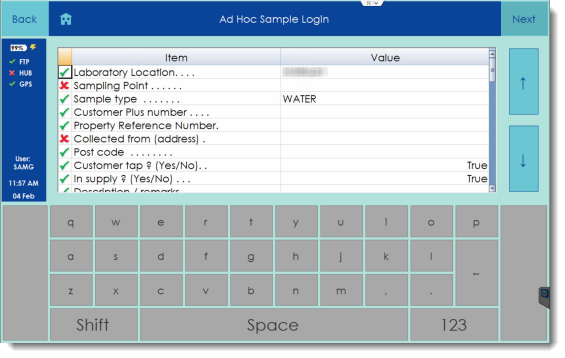
The following screen has a variety of fields on it that can be used to enter the necessary information to set the location for the ad hoc sample. Fields with a green tick are optional and those with a red cross are mandatory and require a value to be entered.
Enter the values for each of the mandatory fields and then tap the Next button.
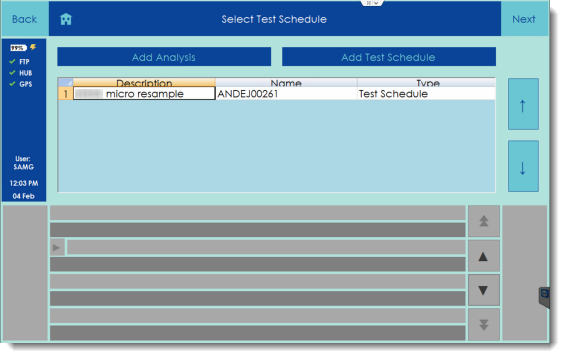
Once the location of the new ad hoc sample has been defined, the analyses, or alternatively, the test schedule for the ad hoc sample will need to be defined. This can be done by selecting either of the two blue buttons at the top of the screen. This step helps Remote Sampler to assign the correct on-site tests and bottles to the ad hoc sample that it creates.
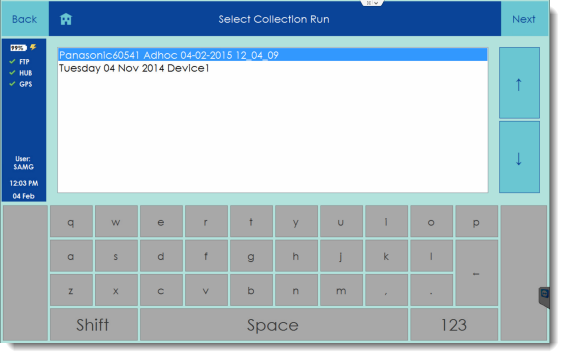
Tap Next and Remote Sampler will generate a new ad hoc sample according to the information entered. The new sample will be put in a new worksheet on its own and it is will be possible to select this worksheet and complete the sample in a similar manner to the regular scheduled samples.
To see more information on how to complete a scheduled sample, please see Completing a Reservoir Sample.
Bottle Scanning
Note: The process for scanning ad hoc sample bottles is different to that for scheduled samples since you will not have LIMS labels for the ad hoc bottles. See Bottle Scanning for Ad Hoc Samples for more information.