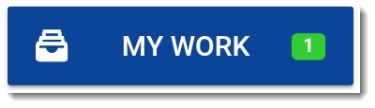
When scheduled work arrives on the device, the My Work button on the Home screen displays a green notification to signify that new work is available for completion.
Tap on the My Work button to open the Select Work by Date screen. This screen groups the work available on the device by assignment date. In this example, there is a single job assigned for completion on 6th December.
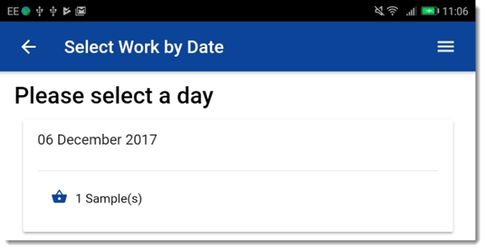
Tap on the box for the desired day to view the jobs available for completion. In the image shown below, there is a single job required at Warehouse 1.
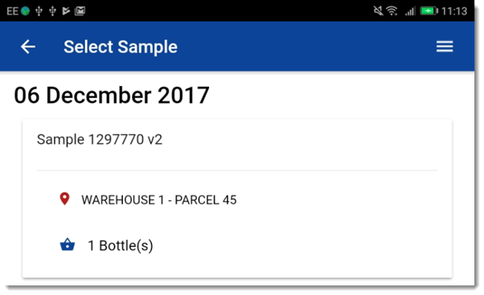
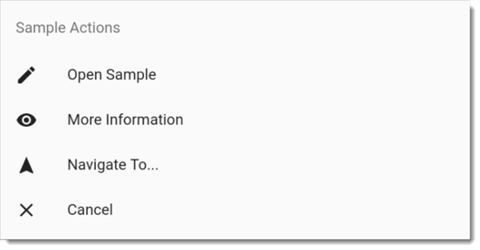
Tap on the box for the desired job and a menu will pop up from the bottom of the screen with several options.
Navigation
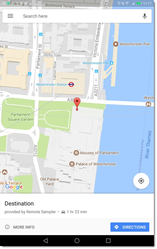
Tapping Navigate To... will open the Google Maps application on the device and begin route navigation if an address or coordinates are present for the selected job.
Tapping Open Sample will then prompt the user to confirm access to the job location.
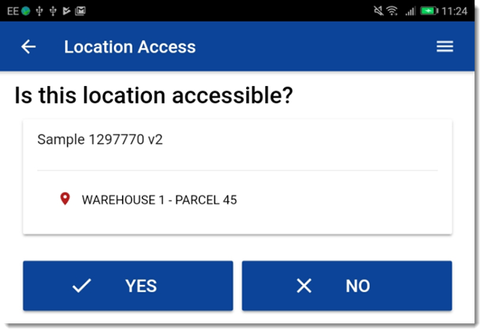
Tapping on Yes will mark the location as acceptable for the job and record the date/time and the GPS position of the device.
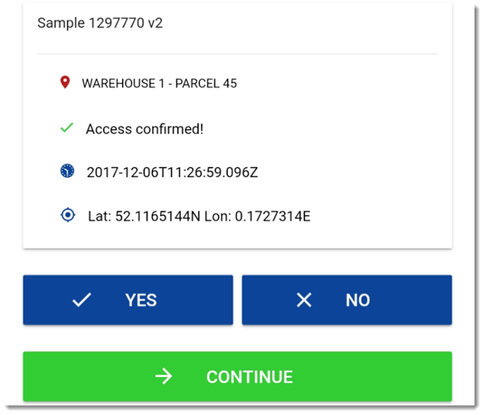
Tap the Continue button to begin entering data for the job.
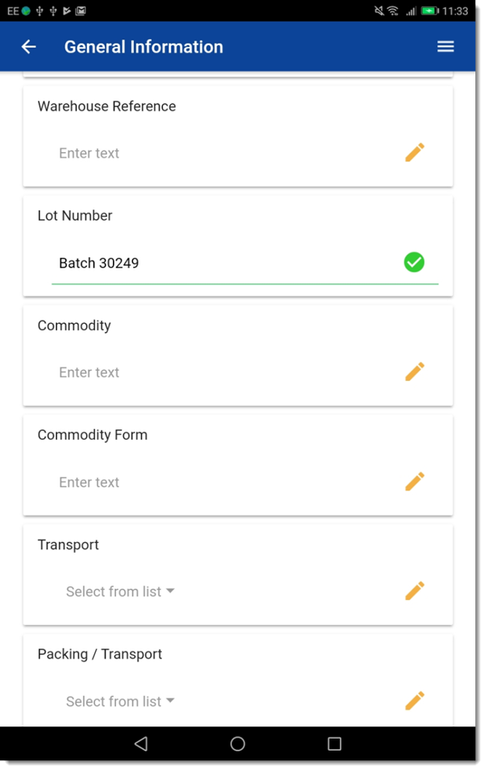
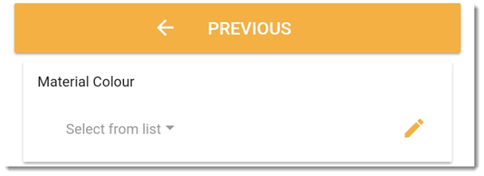
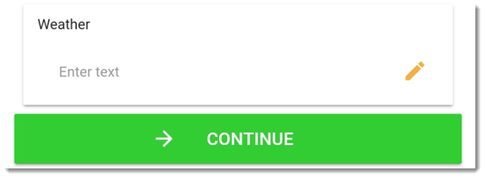
All data fields required for the job will be displayed in order. Data fields requiring entry are shown with an orange pencil icon. Optional data fields, those with default values or completed fields are marked with a green tick to indicate their status. Enter data in a given field by tapping on the box containing the field and use the editor provided i.e. a keyboard for text or numeric data or a date picker for dates and times.
Related onsite data may be grouped into sections to make completion more manageable. To navigate between groups, Previous and Continue buttons are available at the start and end of each section.
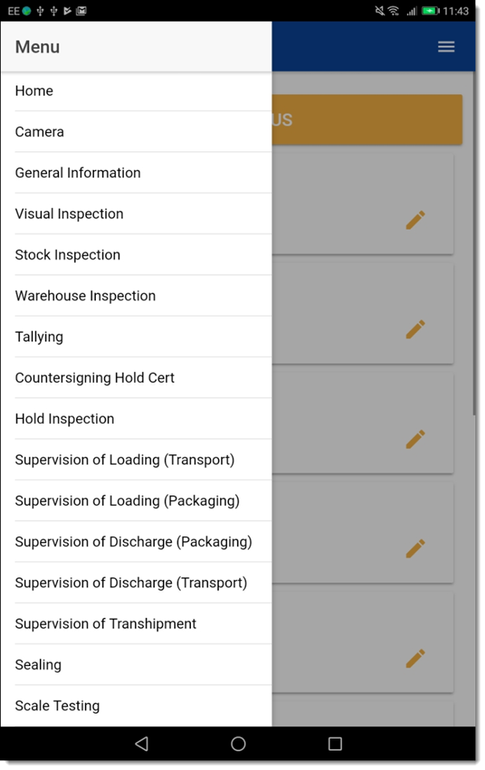
It is also possible to navigate between groups using the menu button at the top-right of the screen.

Tapping this button will show a sidebar menu showing all available groups as well as other commonly used screens like the Home screen and the Camera screen.
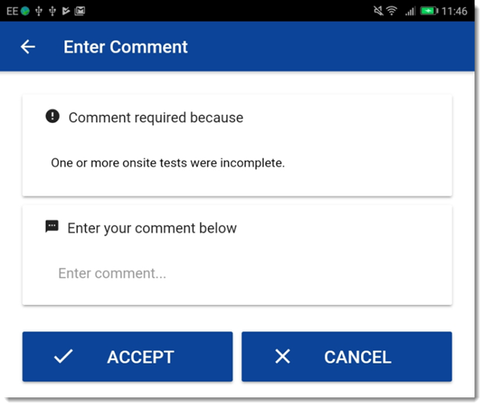
Pressing the Continue button on the last group of onsite data fields completes the data entry part of the job. If one or more mandatory data fields have been left incomplete or values have been entered that break numerical limits then Remote Sampler may ask for a comment to be entered to explain the problem. Enter a comment in the lower box by tapping on it and then tap the Accept button.
If the job requires the collection of one or more physical items (e.g. a barcoded sample bottle or a box) then the Scan Collected Items screen will be displayed.
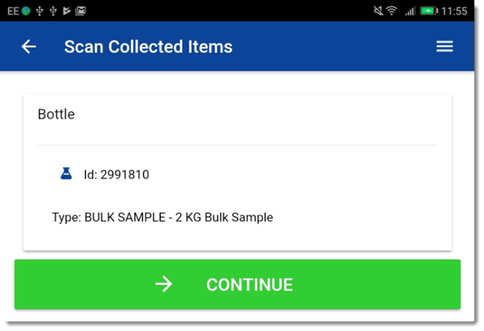
Tap on the box for an item to show a popup menu with several options.
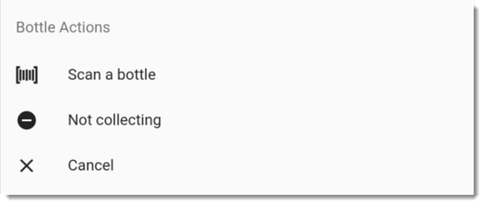
Tap Scan a bottle to display the Scan screen.
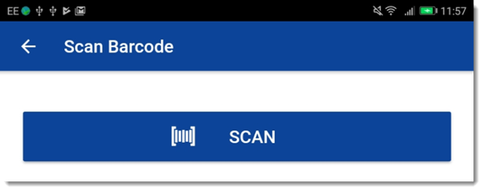
Tap the Scan button to activate the device camera.
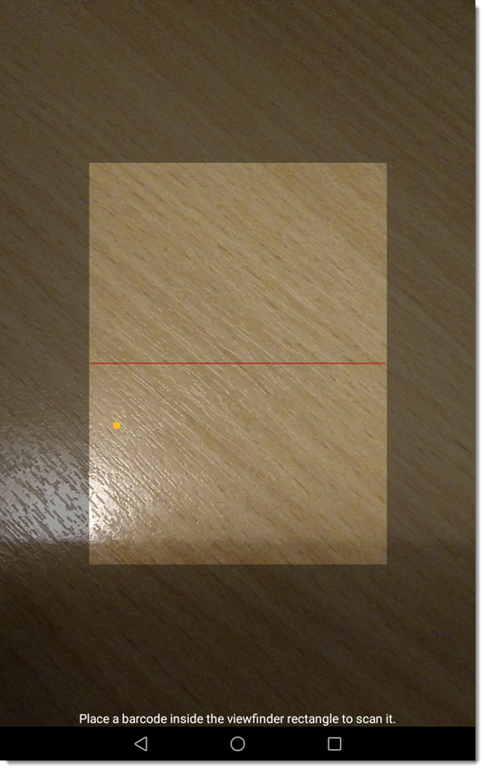
Follow the onscreen instructions to scan the barcode on the item. A successful scan will display the Scan screen once more but this time with information about the item scanned and a new option to perform the scan again.
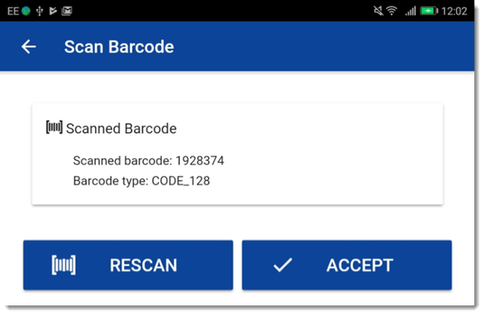
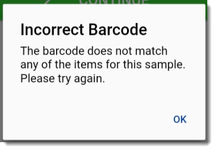
Tap the Accept button to confirm the correct item has been scanned. If an incorrect item has been scanned, Remote Sampler will display a prompt.
Following a successfuly item barcode scan, Remote Sampler will record the date/time and GPS position of the device against the item.
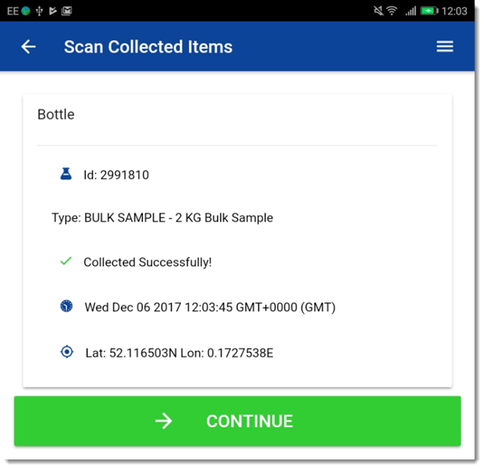
Tapping the Continue button shows the Job Complete screen. Tapping the Send button on this screen will send all remaining data for this job back to the Remote Sampler hub and it will mark the job as complete and remove it from the device. Only tap this button when no further changes are required to the job data.
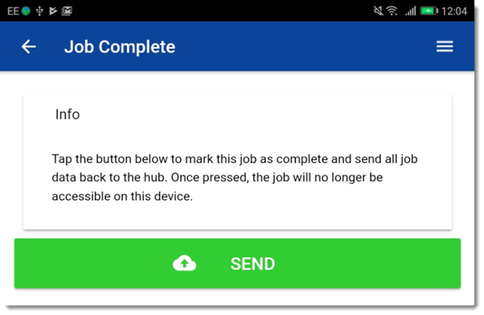
Once the final job data has been sent from the device, the scheduled job is complete.