Collecting Items in the Field
The Process
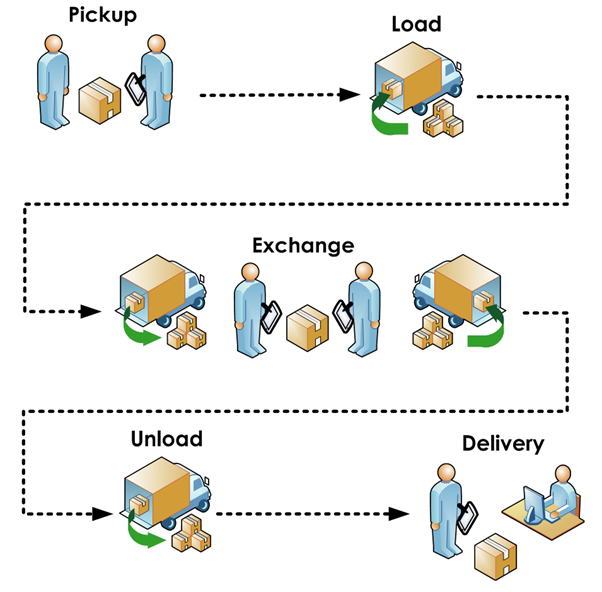
Remote Sampler can be used to record a chain of custody for items from collection, across multiple transfers to a final destination as shown in the diagram below.
Item Types
Remote Sampler distinguishes between the following three types of items:
| Individual Bottle A single bottle with its own dedicated barcode label that will be moved from place to place. |
| Open Consignment An open container with a known number of subitems. The container itself has a dedicated barcode label and it is this label that will implicitly track the movements of all contained subitems. |
| Closed Consignment A closed container with an unknown number of subitems. The container itself has a dedicated barcode label and it is this label that will implicitly track the movements of all contained subitems. |
Barcode Labels
Remote Sampler is designed to handle two different types of barcode labels for tracking item custody:
- LIMS barcode labels - unique labels generated by a LIMS system and already affixed to sample items.
- Pre-printed temporary labels - Ad hoc labels applied to items in the field when they have not been registered on LIMS. Remote SAmpler can track the movement of items with temporary labels and map them to LIMS labels upon item receipt.
Collecting or Exchanging Items
To record custody information in Remote Sampler, open the Custody screen by tapping on the Custody button available on the Home screen.

This will open the custody scan screen as shown below.
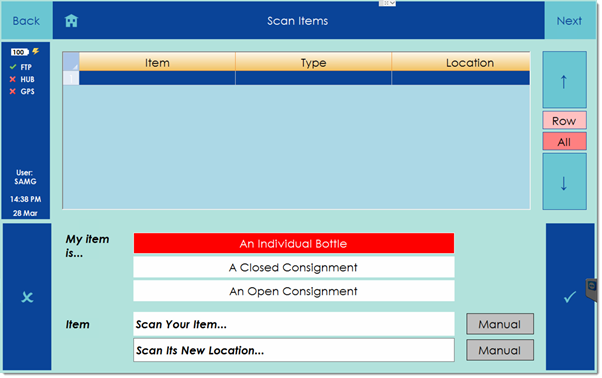
This screen can be used to record one or more items along with the destination location to which they are being moved.
Every item that is collected by the user needs to be scanned into each new location it is moved to. Note that collecting samples in Remote Sampler through the normal sample collection workflow automatically records the bottles for that sample as having been placed in the vehicle fridge set in the software. If the user has not performed the samples for the bottles being collected then they must be manually scanned using the following process to record their new location in the user's vehicle fridge.
Step 1 - Scan the new location
If the user is collecting pre-sampled bottles from a location in the field, then the new location is the vehicle fridge into which the sample bottles are being transferred.
Upon scanning the destination vehicle fridge barcode with the device barcode scanner, the location box on the screen will be populated with the value of the barcode for the set location as shown below.

Step 2 - Scan the items
For each item to be collected, set the item type from the available options. The selected item type will be highlighted in red.
Note that for open consignments, it is necessary to specify the number of subitems in the consignment container by entering a number in the box shown in the bottom right of the image below.

The user should then scan each of the items being moved to the destination location using the mobile device barcode scanner. Temporary barcode labels should be used where LIMS labels are not present. Each consignment container should be given a single label for tracking rather than labelling each subitem.
Upon scanning each item, a new row will be entered in the grid.

Step 3 - Send the data
Once all items have been scanned, the data can be sent back to the Remote Sampler hub by tapping on the Next button in the top right of the screen followed by tapping the Send to Hub button on the following screen.
Recording an Exchange of Items
To record the exchange of items from one Remote Sampler user to another in the field, the receiving user should perform the steps explained above to create custody records for each item moving into their vehicle fridge. There is no requirement for any action by the user offloading the items.
Recording Arrival at a Final Destination
Arrival at a final destination is handled by the receiving user on the Remote Sampler hub rather than using a mobile device.